Shopify
Shipink simplifies the management of your Shopify store. To begin using Shipink with your Shopify store, please visit https://apps.shopify.com/shipink and click on "Add app". You will be directed to a page that displays Shipink's permissions and access scope. Click on "Install App" to proceed.
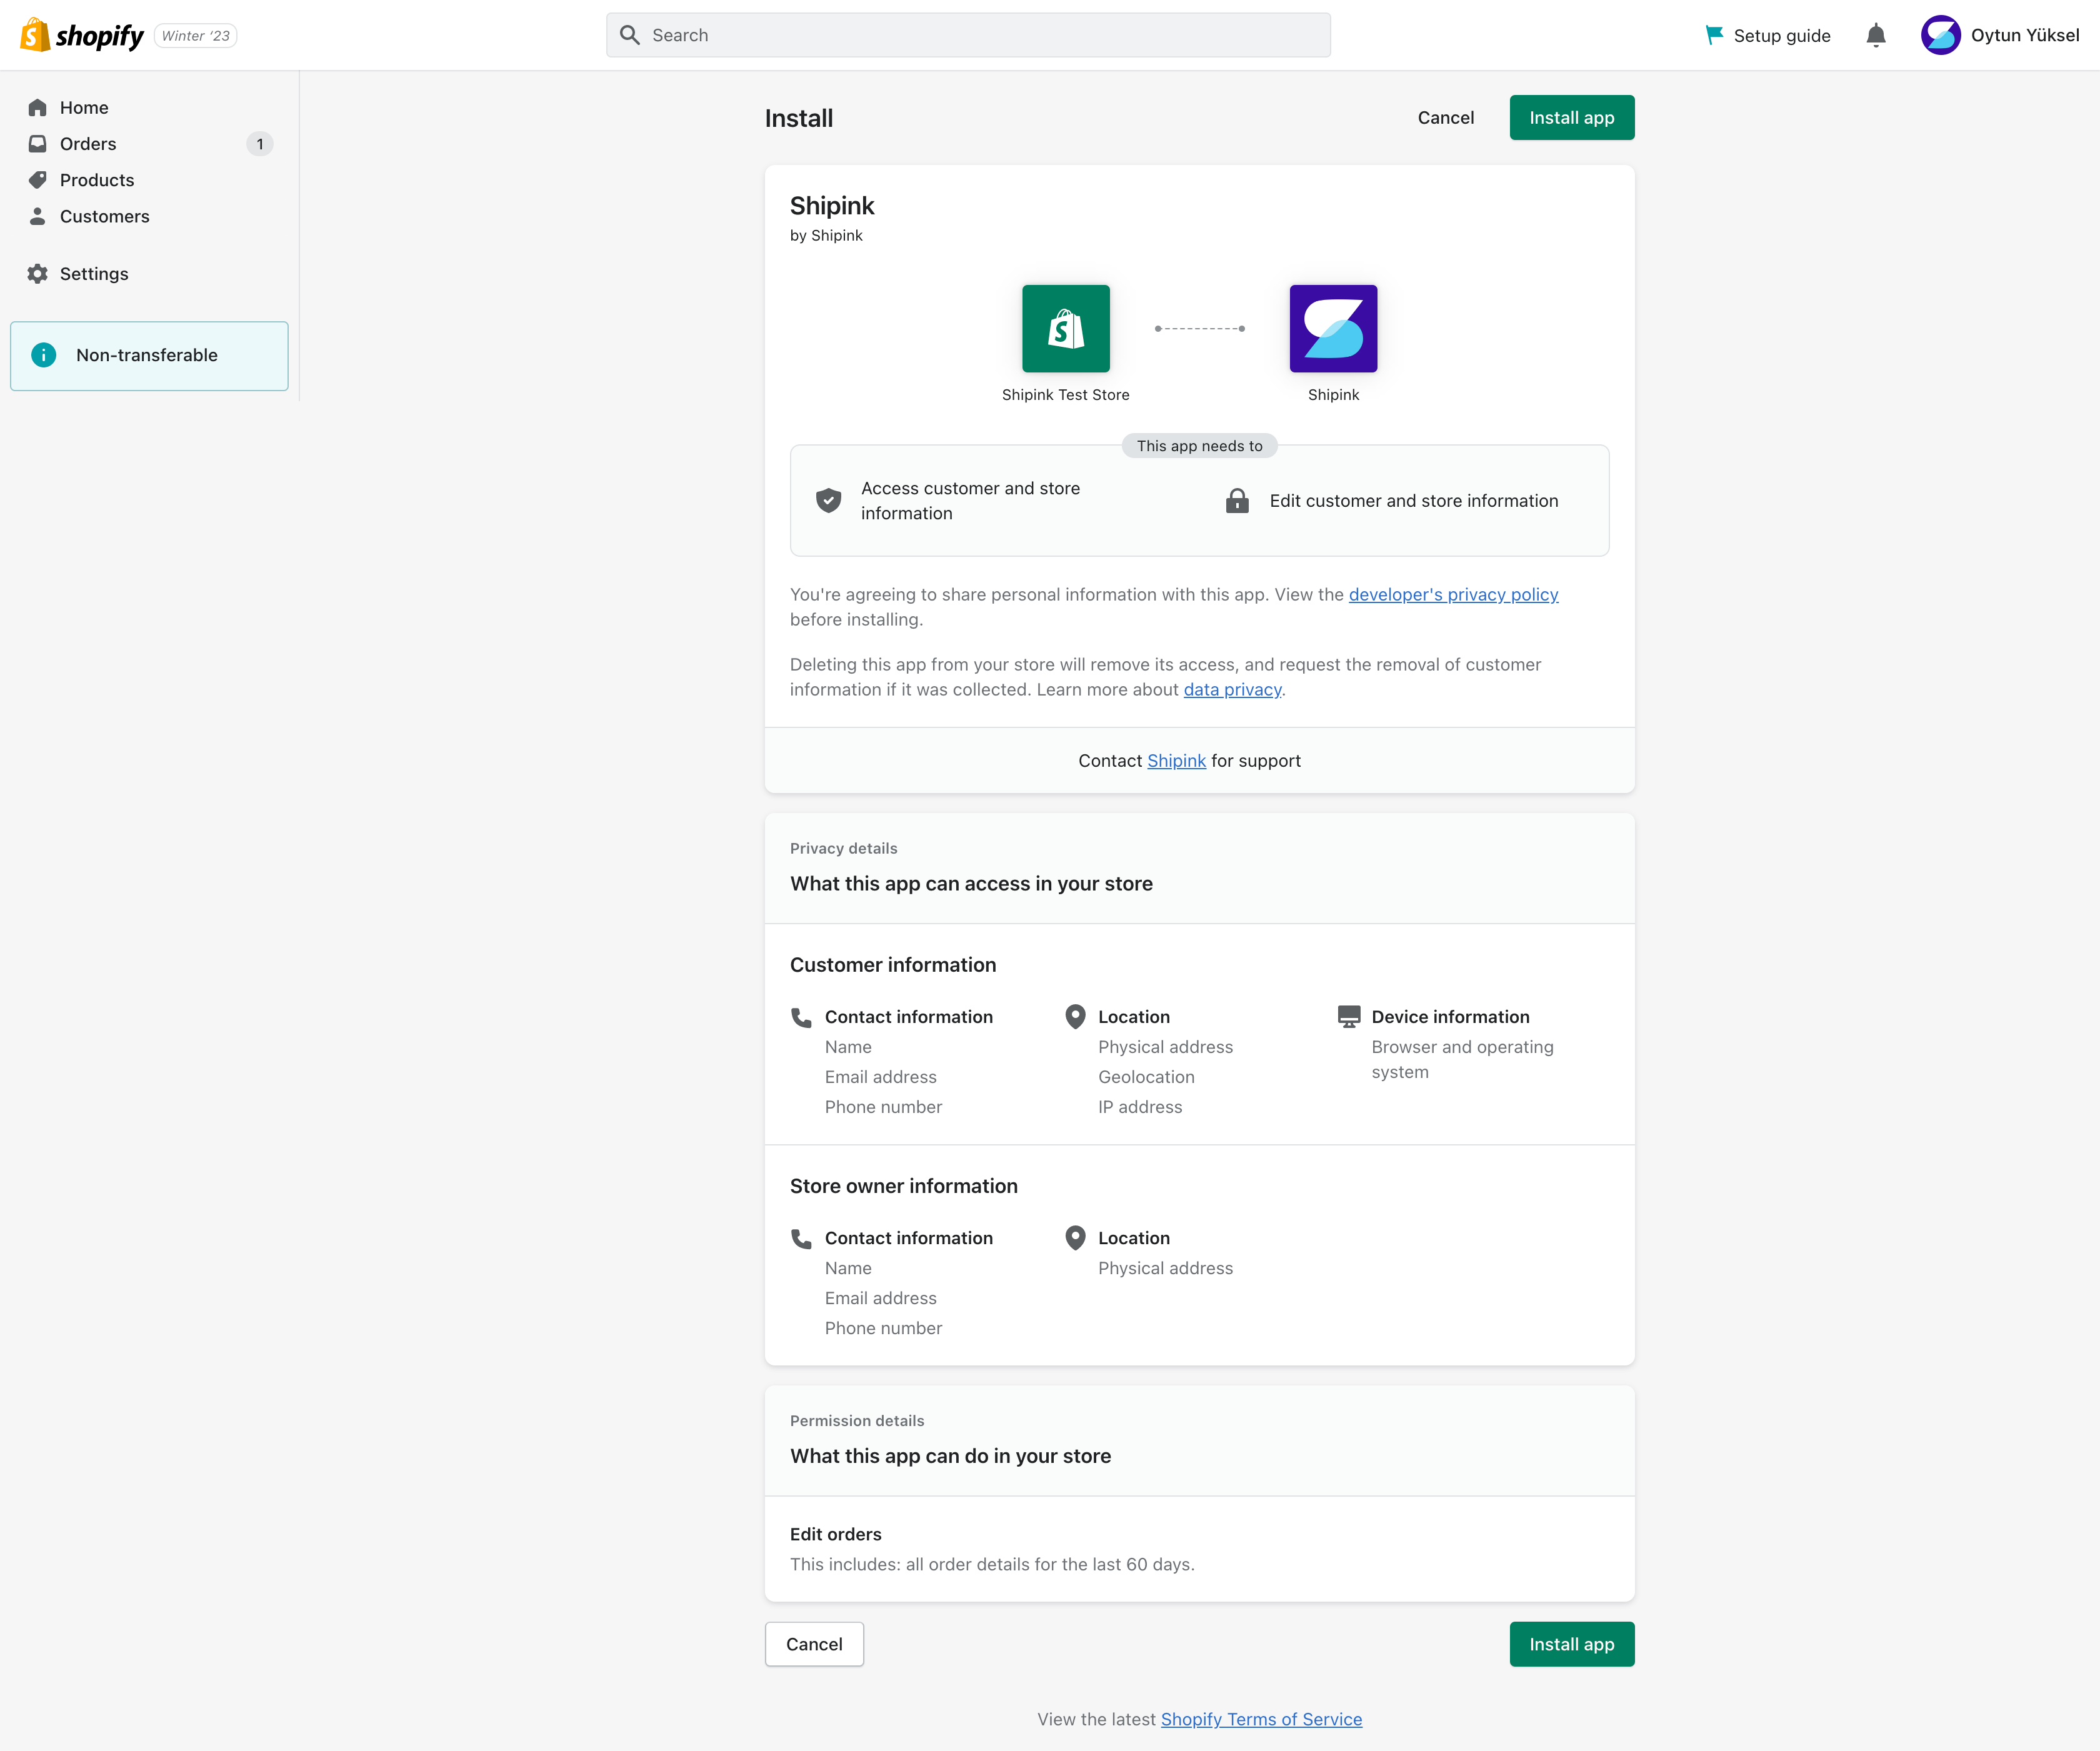
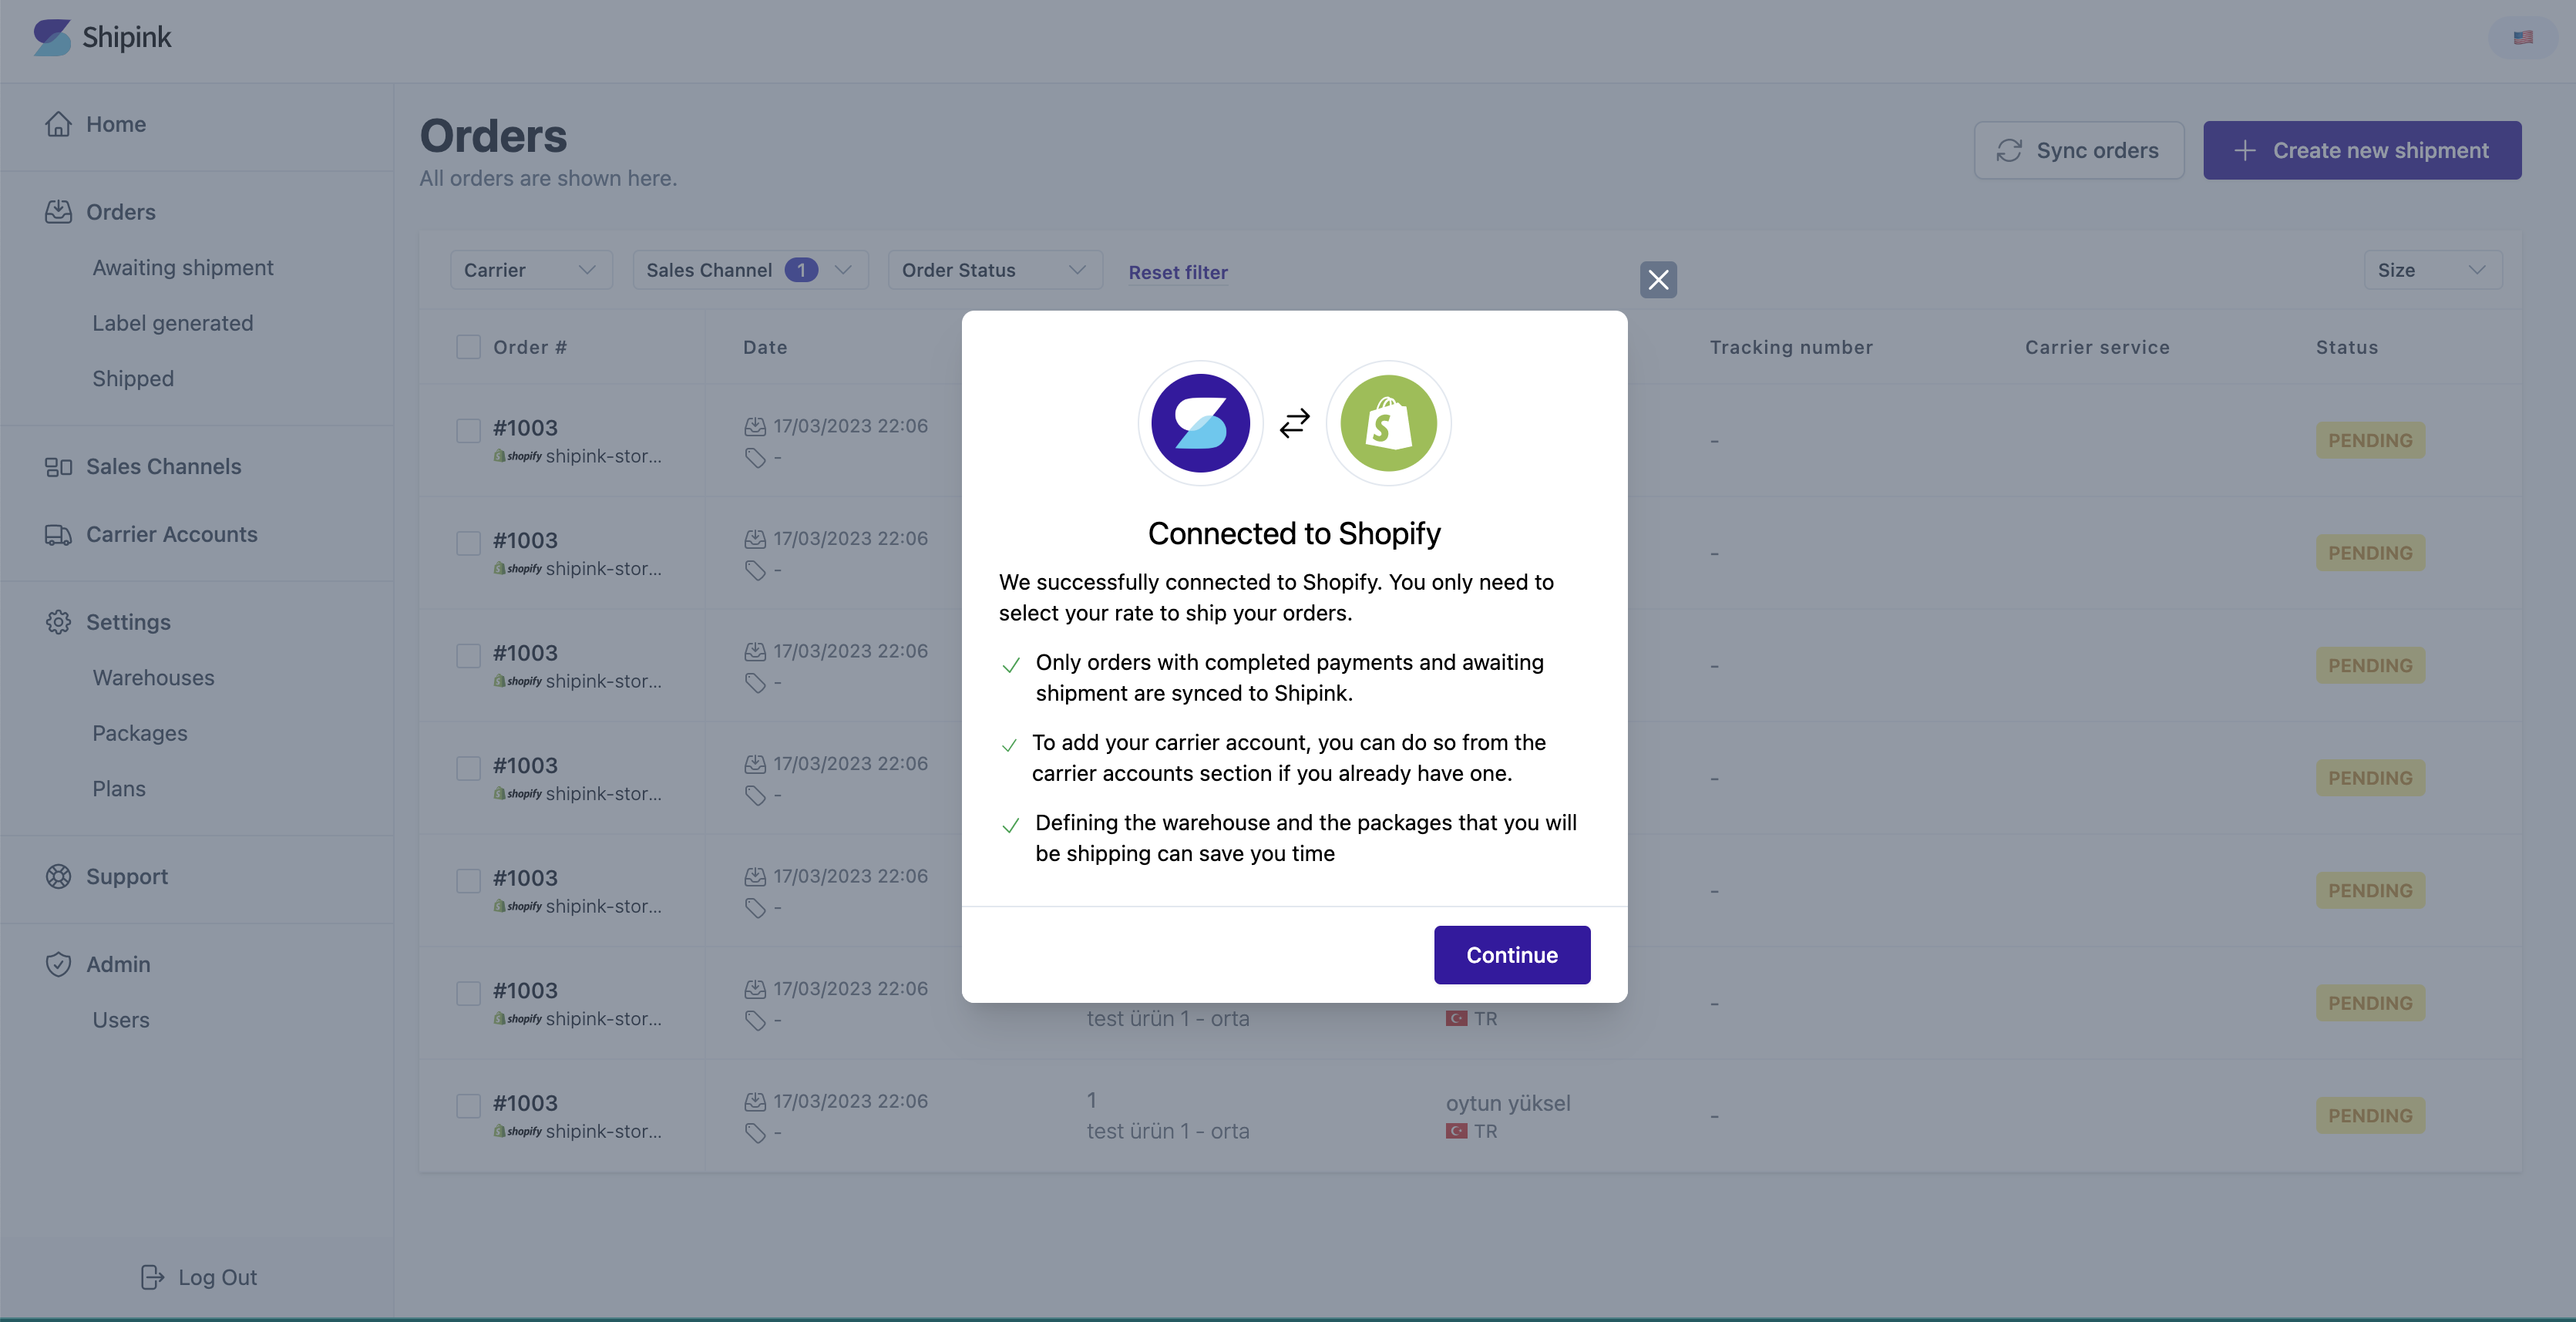
Upon clicking, you will be redirected to Shipink. If you already have a Shipink account, click on the login button. If not, click on the register button to create an account. Once you have completed the registration process, a pop-up message confirming that you have successfully connected your Shopify store to Shipink will appear.
Configuration
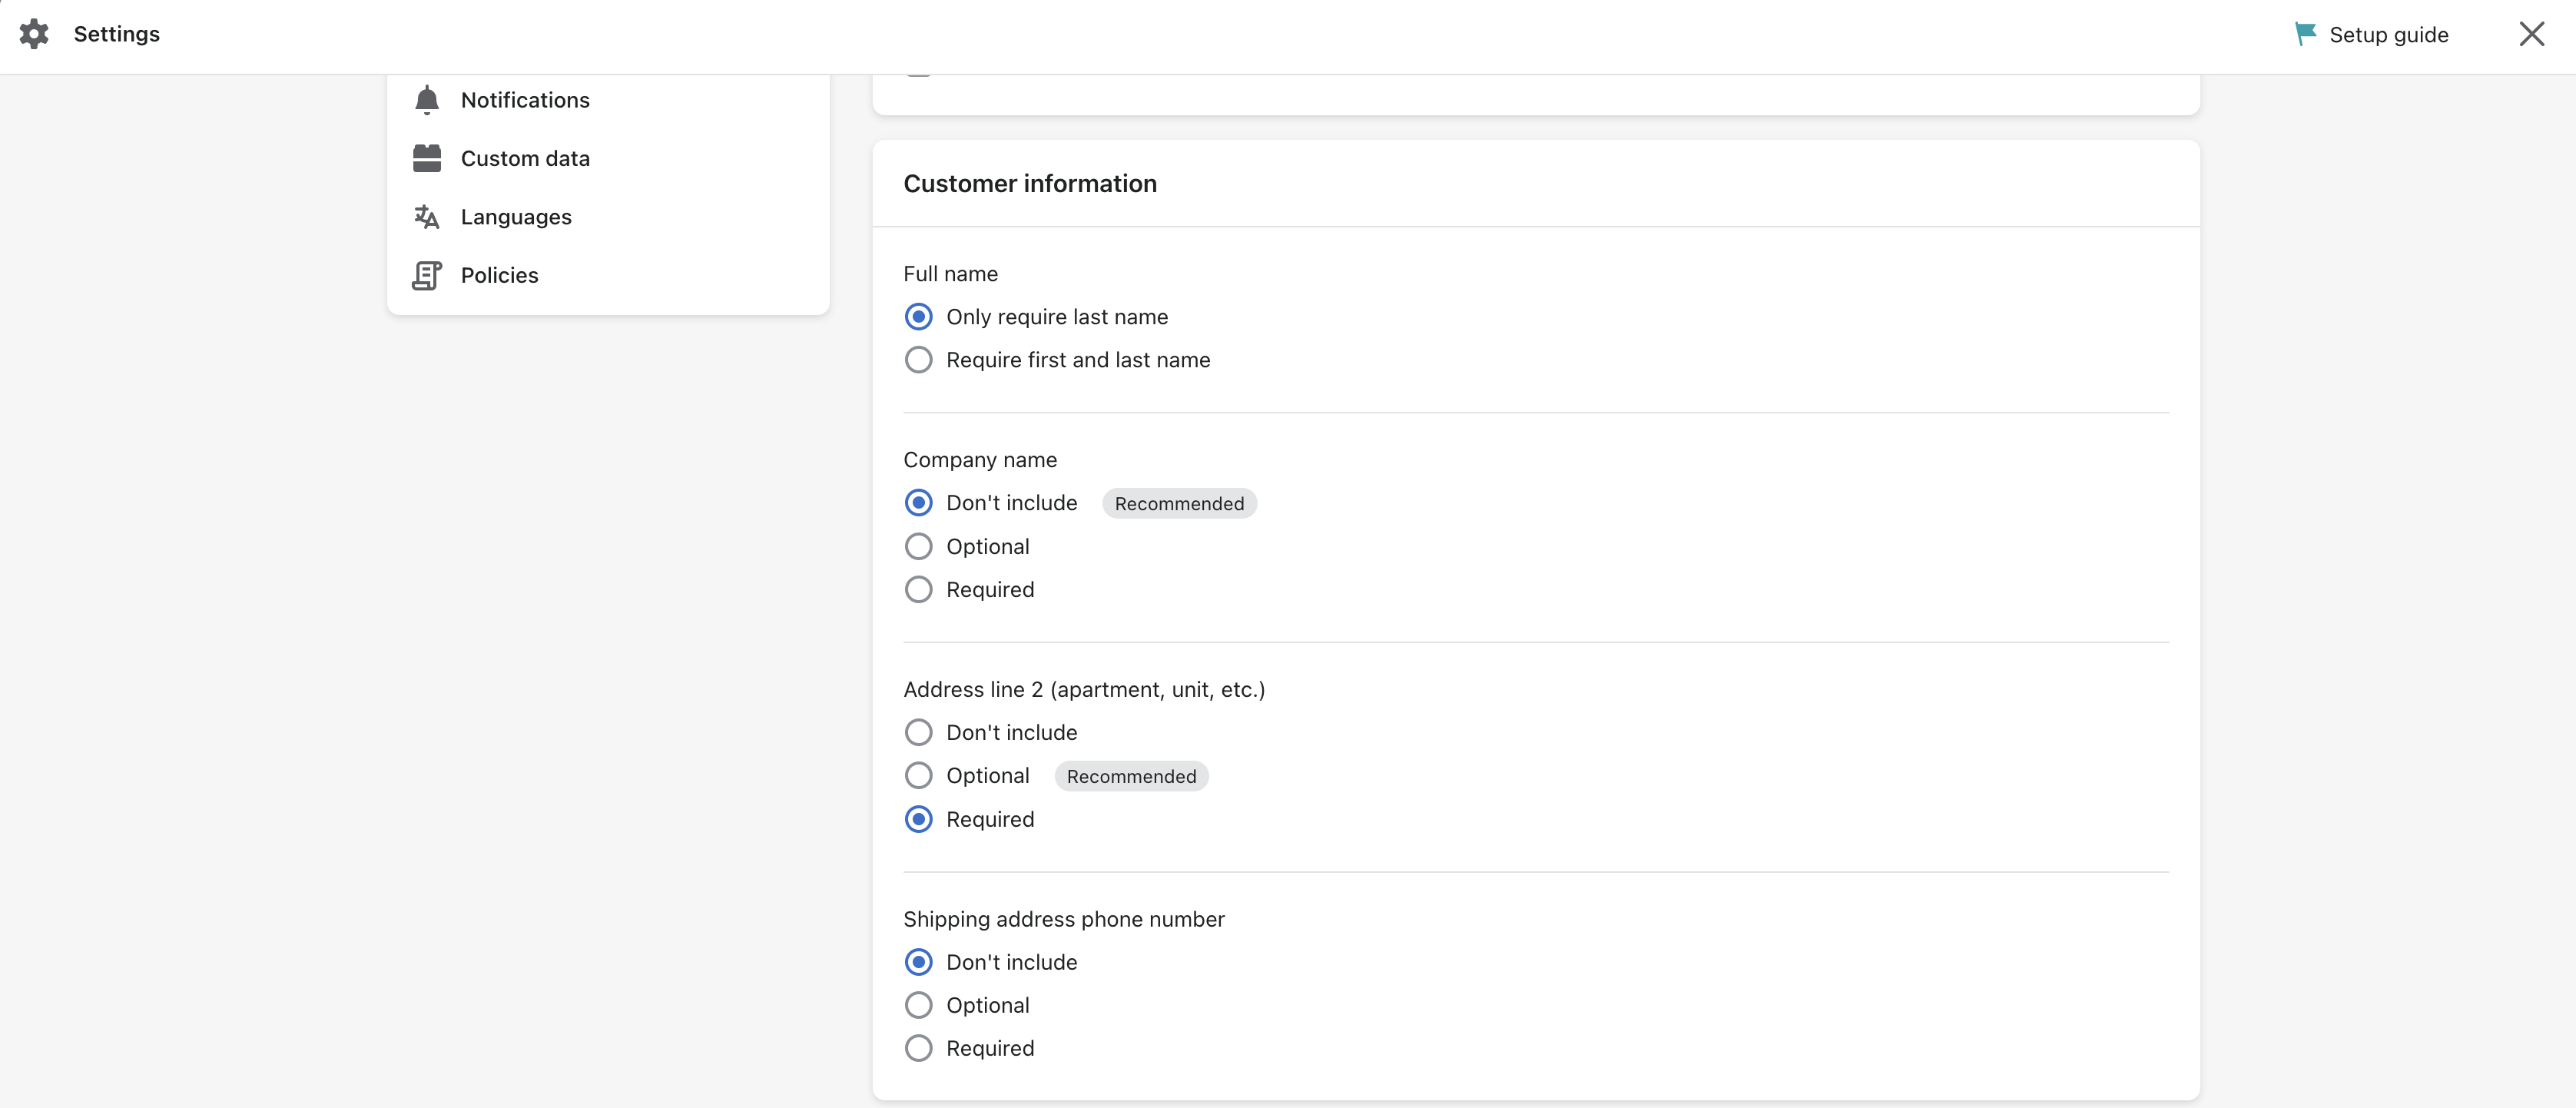
Prior to utilizing Shipink, you must configure your address settings. To accomplish this, access your Shopify admin panel and click on the "Settings" button. A pop-up window will appear, then select the "Checkout" option. In the "Customer information" section, update the "Address line 2 (apartment, unit, etc.)" field to "Required".
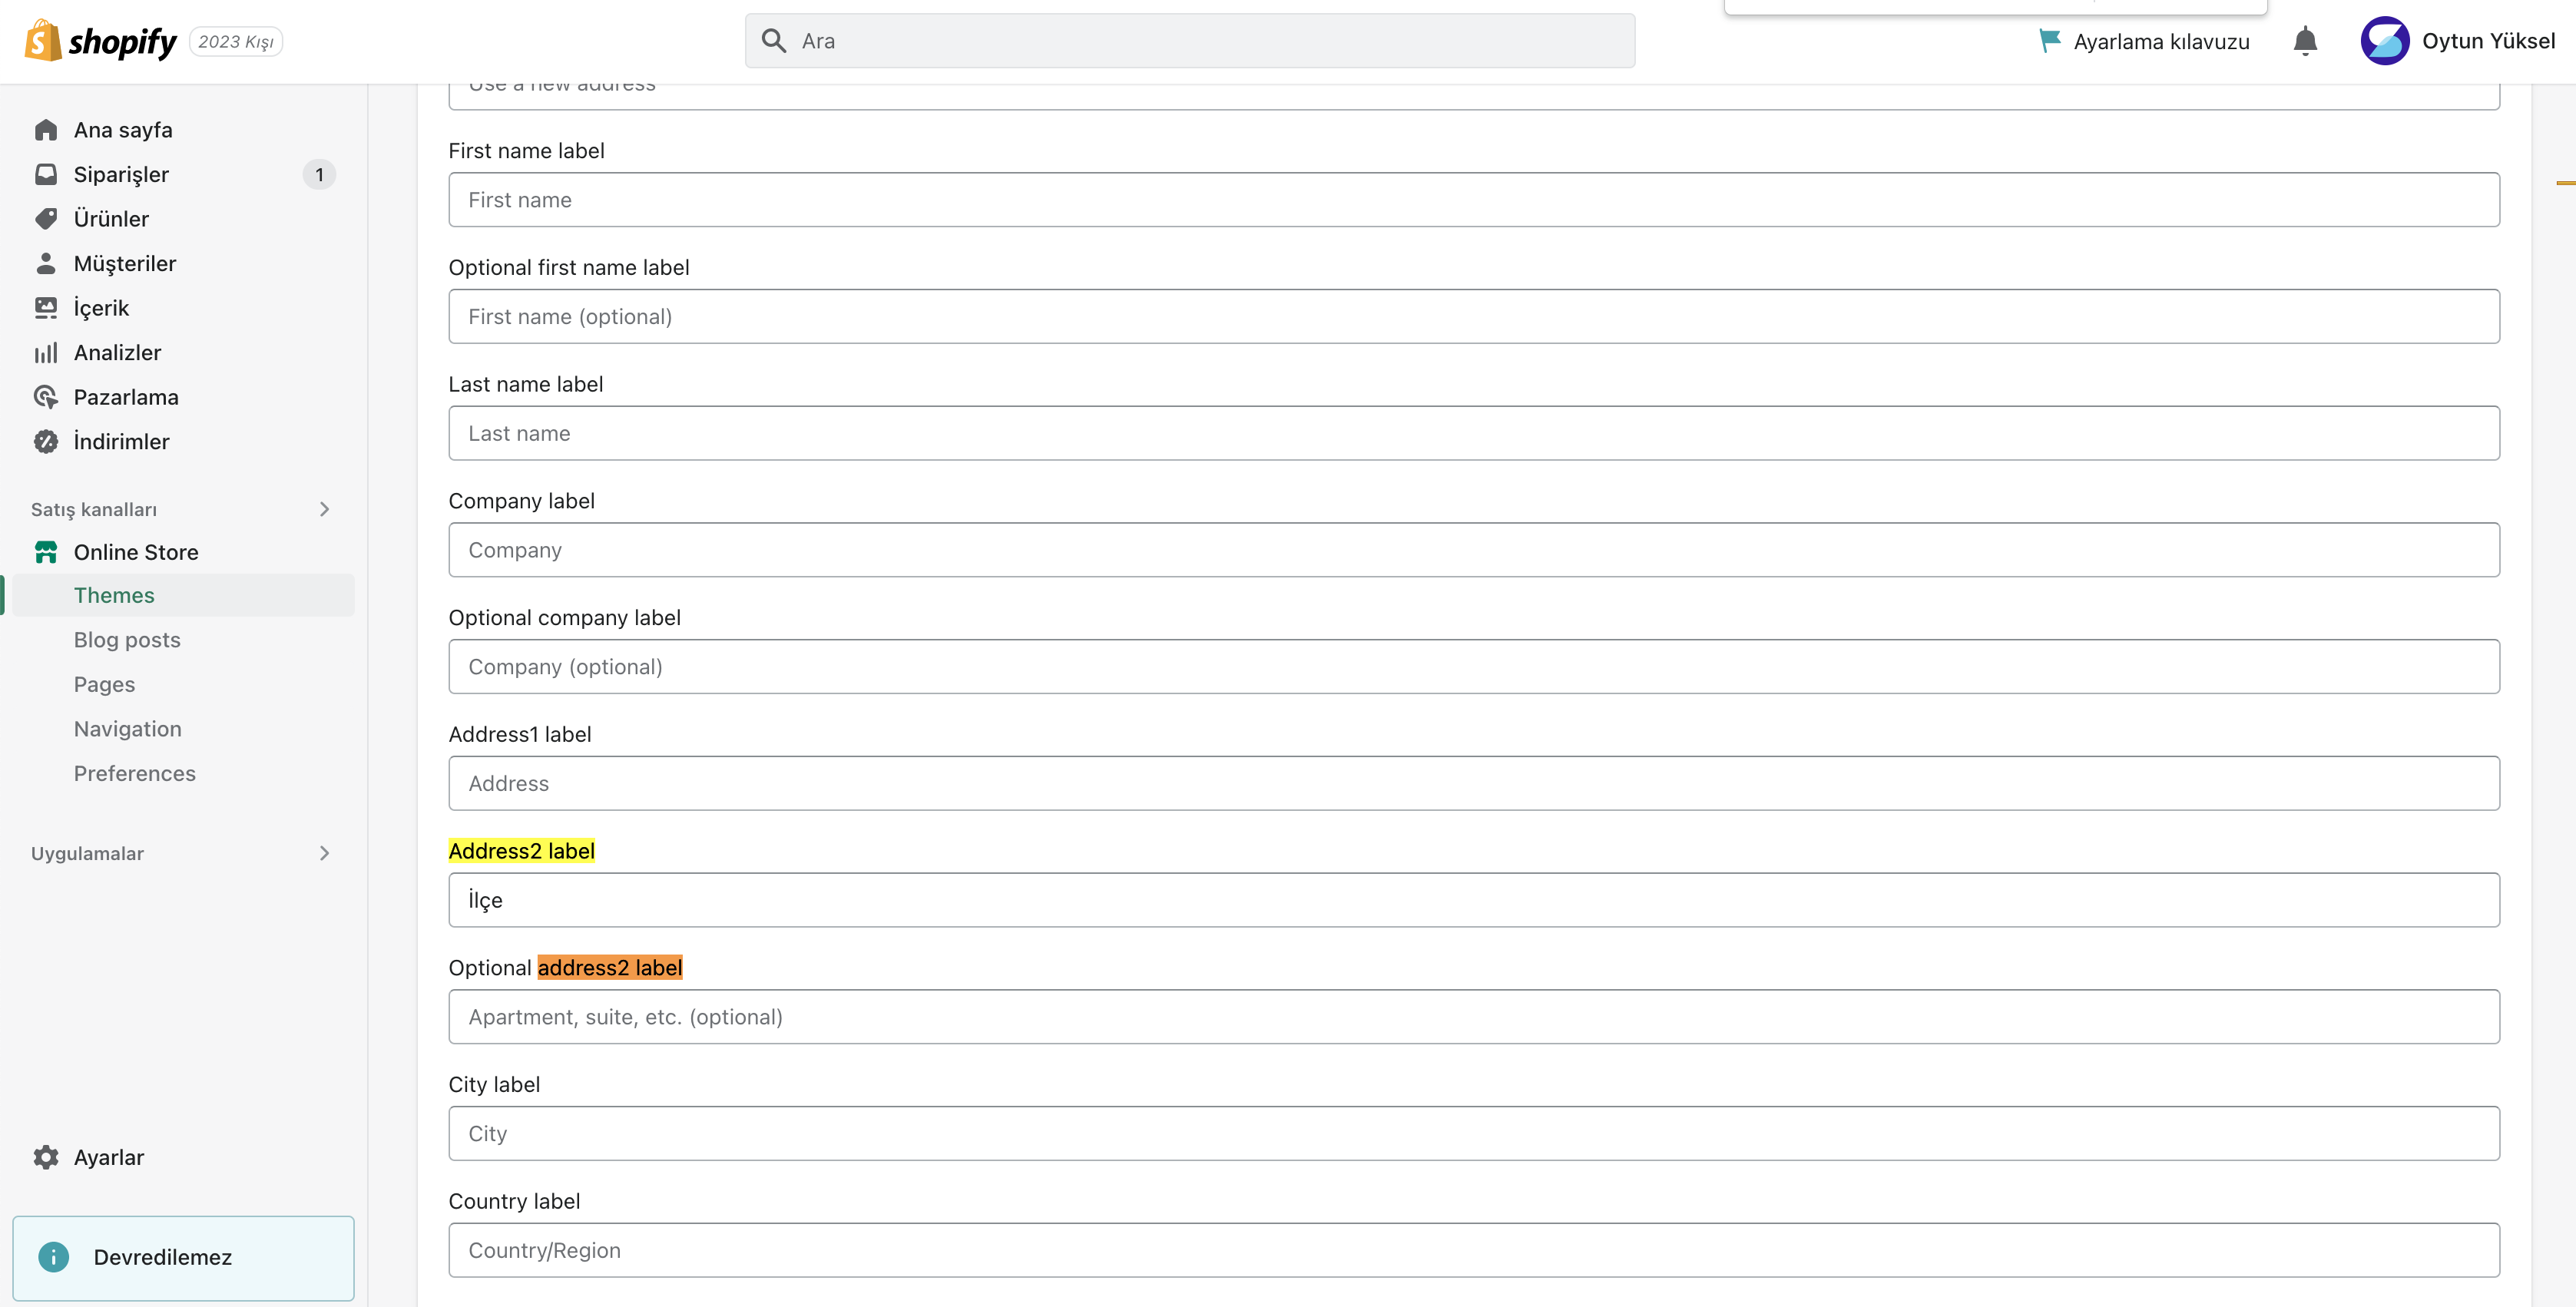
Finally, scroll down to the bottom of the page and select "Manage checkout language".

Locate the "Address2 label" section, enter "İlçe" in the input field, and click on the "Save" button.
Important Note
Please note that Shipink will only be operational for orders that are created after implementing these settings.